Kqed Bread Recipe for Slow and Easy Bread Baked in a Pot
How To Make No-Time Bread
We independently select these products—if you buy from one of our links, we may earn a commission. All prices were accurate at the time of publishing.
So, by now you've tried no-knead bread and no-knead bread in a hurry, a slightly quicker variety, and you've seen how easy it is to bake bread at home. The no-knead phenomenon is still going incredibly strong, and we think it's because it's taught so many people how easy bread really is!
You can play with bread basics and yeast to suit almost any schedule. The one thing you usually need in making bread, though, is time. No-knead bread is delicious partly because of the very long rise. But what if you have a craving for last-minute yeasty goodness? What if you are making dinner and have only an hour or so, and biscuits just won't do? Introducing no-time bread. It's what you've been looking for.
What Is No-Time Bread?
If you're a baker you should be instantly suspicious; time is what generally makes bread good. We can't promise the incredible slow-rise flavor of no-knead bread here, but you can indeed trick yeast into a fast rise that gives a different but still delicious homemade loaf.
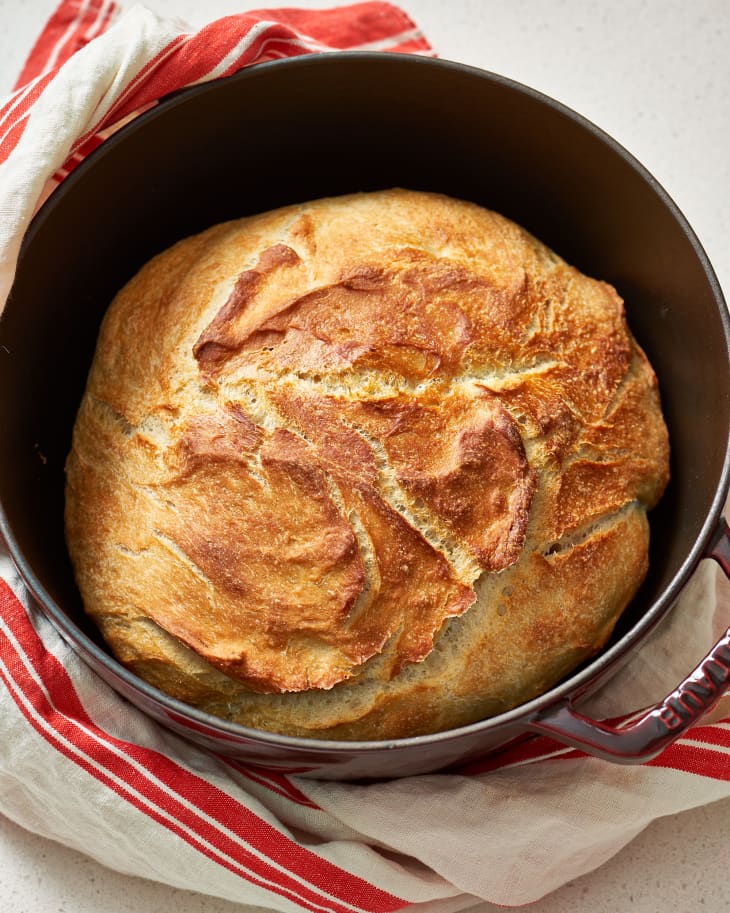
The crumb of this bread is much finer than no-knead; the dough is not quite as wet, so it has a finer crumb compared to the rustic wide holes of a wetter dough.
And the taste? Obviously it doesn't have those complex flavors that are born of long, slow rising. Instead it is yeasty and moist — with just a hint of a tang. We use a little trick from Shirley Corriher, who adds a touch of vinegar to quicker yeast doughs. This simulates a little of the flavor you get in long-rise doughs. It's also incredibly moist and tender, with that homemade yeasty comfort, just slightly sweet from the sugar that is added to get the yeast working quickly.
For Your Information
- This bread gets a jump-start in rising from a few minutes of heat, followed by resting in the microwave.
- Bake this loaf in a covered Dutch oven, like no-knead. This helps the dough spring to life under its own moisture and develop that wonderful crackly crust and tender interior.
Key Steps for No-Time Bread
- Preheat the Dutch oven. Just like with our no-knead breads, bake this bread in a preheated Dutch oven for a thin, crackly crust. If you heat the pan while you heat the oven, it will be hot enough to give the dough a good oven spring — which results in a loftier loaf.
- Preheat the dough. No really! You're going to cover the kneaded dough in a large microwave-safe bowl and heat for 25 seconds to activate the instant yeast and get the dough rising.
- Rest the dough between bursts of heat. In between microwave bursts, let the dough rest in the microwave where it will continue to rise. Follow the first 25 seconds of microwaving with five minutes of resting, and the second burst of microwave heat with 15 minutes of resting time.
Baking and Eating No-Time Bread
Once the dough is shaped into a loaf, its ready for baking. There's no need for further rising. You can shape the dough into a nice tight ball and put it right into the preheated Dutch oven. Bake, covered, for 30 minutes, then uncover and bake for 10 more minutes.
Cool the bread for about 10 minutes before slicing and slathering with butter or serving with soup.
More Ways to Make Bread at Home
If you have time, make a slow-rise dough. If you don't have time, don't forgo bread — try no-time bread.
- shellfish-free
- kidney-friendly
- alcohol-free
- low-potassium
- pork-free
- pescatarian
- no-oil-added
- egg-free
- red-meat-free
- low-fat
- dairy-free
- fish-free
- vegetarian
- peanut-free
- vegan
- sugar-conscious
- soy-free
- tree-nut-free
Per serving, based on
8
servings. (% daily value)
- Calories 230
- Fat 1.2 g (1.8%)
- Saturated 0.2 g (0.8%)
- Carbs 46.1 g (15.4%)
- Fiber 2.0 g (8.2%)
- Sugars 1.8 g
- Protein 8.1 g (16.2%)
- Sodium 252.8 mg (10.5%)
Ingredients
- 2 (1/4-ounce) packets
active dry yeast (4 1/2 teaspoons)
- 1 tablespoon
granulated sugar
- 1 1/2 cups
water
- 3 1/2 cups
bread flour
- 1 1/4 teaspoons
salt
- 3/4 teaspoon
balsamic vinegar
Instructions
-
Proof the yeast. Place the yeast, sugar, and water in the bowl of a heavy-duty stand mixer and stir to combine.
-
Preheat the oven and the Dutch oven. Arrange a rack in the middle of the oven, remove any racks above it, and heat to 450°F. Place a Dutch oven (or one of these alternatives) in the oven as it heats.
-
Add most of the flour, salt, and vinegar to the yeast and knead for 5 to 7 minutes. Now that the yeast has had a few minutes to bubble up, add 3 cups of the flour, the salt, and the vinegar. Beat on low speed for several minutes with the paddle attachment. Add the last 1/2 cup of flour and switch to the dough hook. Beat for 7 minutes. Alternately, knead vigorously for 5 minutes, or until the dough becomes extremely elastic. This will still be a wet dough, but not goopy. The dough will clear the sides of the bowl but still stick to the bottom.
-
Shape the dough into a ball and rise in the microwave for 25 seconds. Lightly grease a large microwave-safe bowl with vegetable oil. Transfer the bread dough into the bowl and turn it to coat in the oil. Cover the bowl with a very wet kitchen towel. Cover the whole thing with a dry kitchen towel and put in the microwave. Microwave on HIGH for 25 seconds.
-
Let the dough rest in the microwave, then microwave again. Let the dough rest in the microwave for 5 minutes. Microwave on HIGH for 25 seconds more. Remove from the microwave and let rest and rise for 15 minutes more.
-
Shape the dough and transfer to the preheated pan. Shape the dough into a ball and plop it into the preheated Dutch oven. Quickly slash the top with a knife. Cover and bake for 30 minutes. Uncover and bake until the crust is golden brown and the internal temperature hits 210°F, about 10 minutes more. Let cool at least 30 minutes before slicing and serving.
Recipe Notes
Storage: Leftover bread can be stored cut-side down at room temperature for up to 3 days. It can also be tightly wrapped in plastic wrap and aluminum foil and frozen for up to 3 months.
Source: https://www.thekitchn.com/easier-no-knead-bread-in-a-hurry-40653
0 Response to "Kqed Bread Recipe for Slow and Easy Bread Baked in a Pot"
Post a Comment